


Tools needed to replace the fan in a Seagate BlackArmor NAS 440/420/400:
One Phillips screwdriver
NOTE: Only fans from Seagate can be used as replacements. Failure to use Seagate replacement parts can and will forfeit the warranty period of the BlackArmor NAS 440/420/400.
WARNING: ESD Precautions
Electrostatic discharge (ESD) can damage the processor, disk drives, main board, memory modules (RAM), and other BlackArmor components. Always observe the following precautions before you replace the fan:
- Do not remove a component from its protective packaging until you are ready to install it.
- Do not touch the component pins, leads, or circuitry.
- Wear a wrist grounding strap and attach it to a metal part of the system before handling components. If a wrist strap is not available, maintain contact with a piece of metal on the system throughout any procedure requiring ESD protection.
- Keep the work area free of nonconductive materials, such as ordinary plastic assembly aids and foam packing.
To remove the fan:
- Power off the BlackArmor NAS unit. This will result in the server being down for maintenance.
- Remove the network cable. The power supply cable should remain connected for grounding.
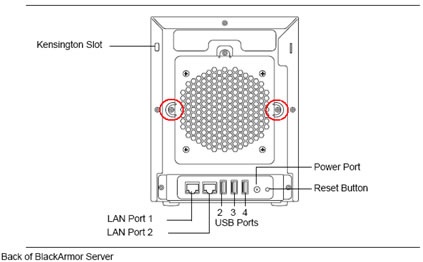
- Turn the BlackArmor unit around so that you can see the back.
-
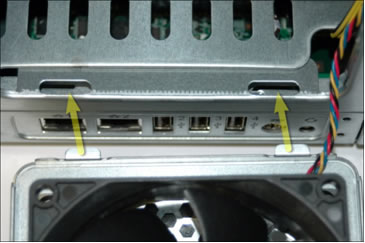
Use the Philips screwdriver to remove the two screws that secure the fan cage.
-
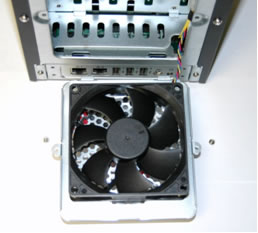
Carefully remove the fan assembly and lay it down.
-
Follow the fan's wiring harness to a small white clip on the inside right side of the BlackArmor NAS.
There are two small tabs on the white clip. Press the one furthest to the right to open the clip.
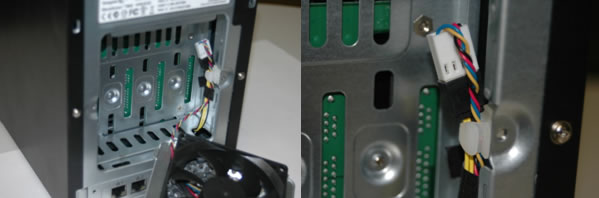
- Remove the wiring harness from the white clip.
- Remove the black tape surrounding the wires.
-
Grasp the BlackArmor's wiring connector with one hand and the fan's wiring connector with the other and carefully pull them apart.
Note the fan's wiring harness positioning. It is oriented closer to the bottom of the unit. -
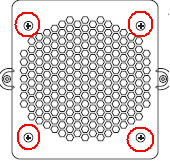
Pickup the fan and remove the 4 screws.
- Separate the fan from the metal backing.
Installing the replacement fan
-
Use the 4 screws and mount the replacement fan to the metal backing.
Note the placement of the fan's wiring harness, so that when it is mounted, the wiring is closer to the bottom of the unit.
Also note the arrow on one side of the fan that indicates air flow. The arrow should be pointing away from the server after mounting. - Connect the two wiring connectors together.
- Wrap the black tape around the wires.
-
Attach the wires into the white clip on the right.
-
Connect the fan assembly to the back of the server with two screws.
Fan replacement has now been completed.