


Setting Up
The Seagate 8-bay Rackmount NAS is shipped with the following installation components:
- Rack rail kit for a standard 19-inch rack
- Cable management arm kit
- Hard drives (the amount of disks will vary by model)
- Seagate 8-bay Rackmount NAS chassis
The instructions are also available in the Quick Start Guide included with the NAS.
Step 1 - Rack
1. Attach the inner rack rails to the Seagate 8-Bay Rackmount NAS using four screws on each side.
2. Unlock the rear screws on the outer rack rails to extend the sliding brackets.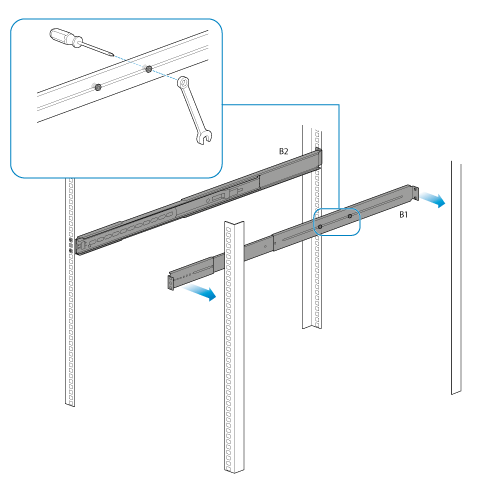
3. Attach the outer rack rails to the rack.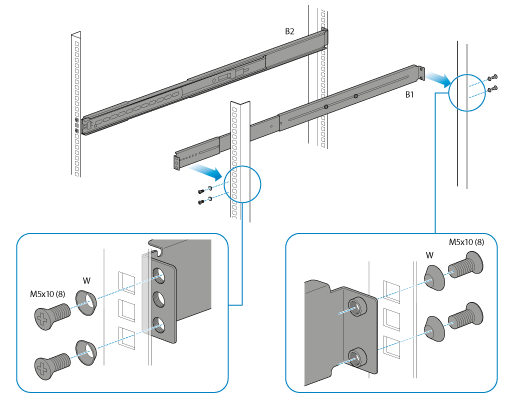
4. Slide the Seagate NAS into the rack. You will hear a click indicating that the NAS is securely fastened to the rack.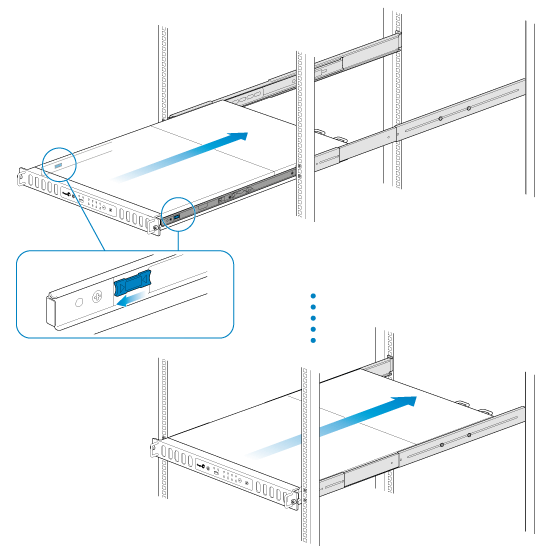
Step 2 - Cable Management Arm
Attach the cable management arm to the back of the rack rails.
1. Snap the right outer connection into the outside rail.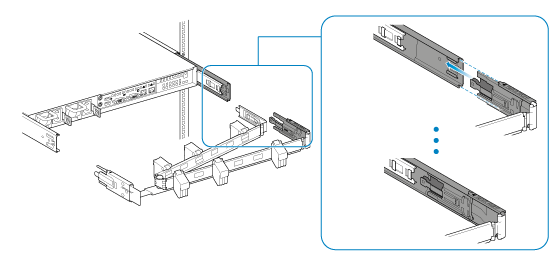
2. Snap the left connection into the outside rail.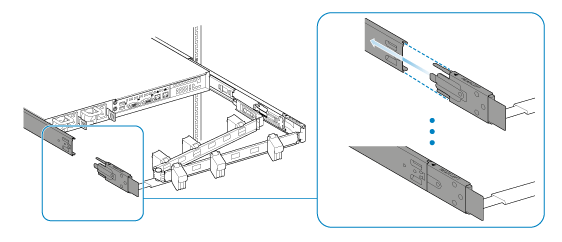
3. Guide the right inner connection into the inner rack rail.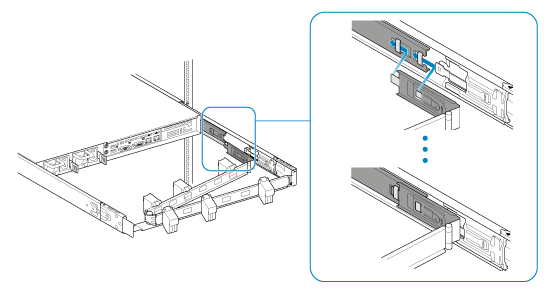
Step 3 - Cables
Connections
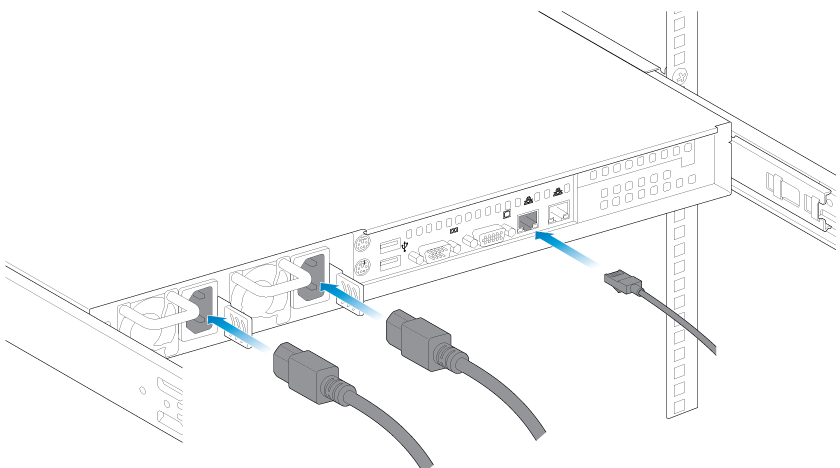
- Ethernet
- Power cables (2)
You can also connect:
- A second Ethernet cable for redundancy or performance.
- A mouse, a keyboard and a VGA monitor for maintenance.
Placement
1. Open the panels on the cable management arm and thread the cables. Allow slack for external connections and sliding the NAS on its rails.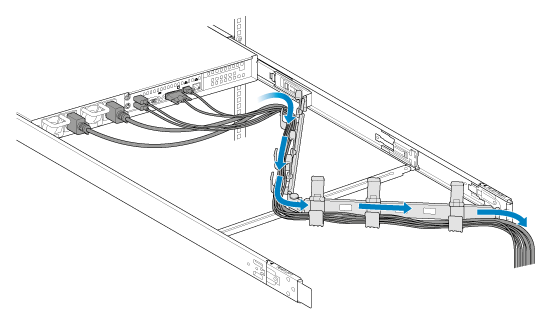
2. Close the panels.
Network and power
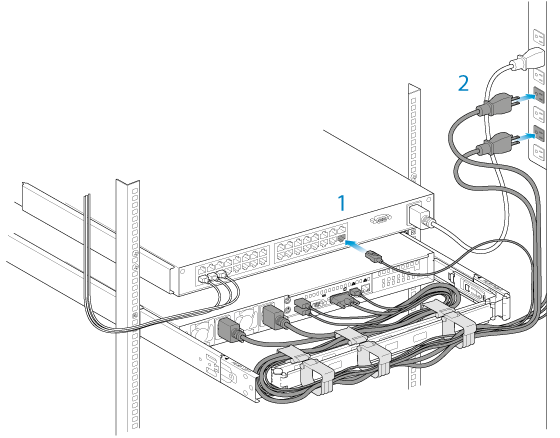
- Connect the Ethernet cables to your router.
- Connect the power cables to outlets.
Step 4 - Drives
Remove the cover
1. Slide the NAS toward you until it locks into position.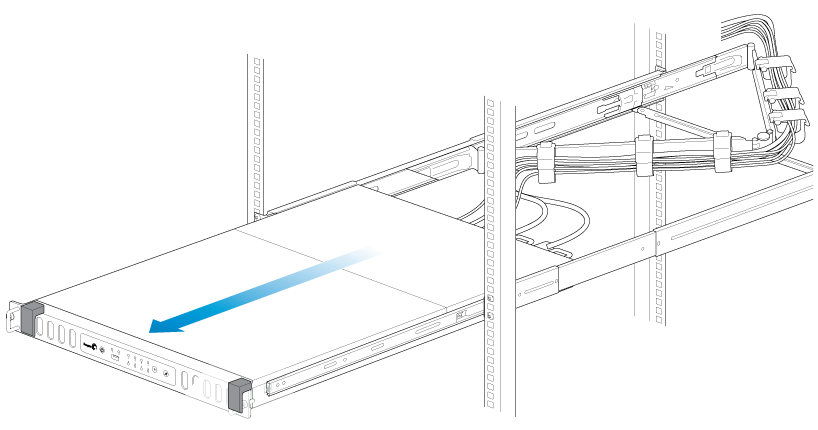
2. Release the cover by simultaneously pushing both front latches toward you.
3. Lift the cover.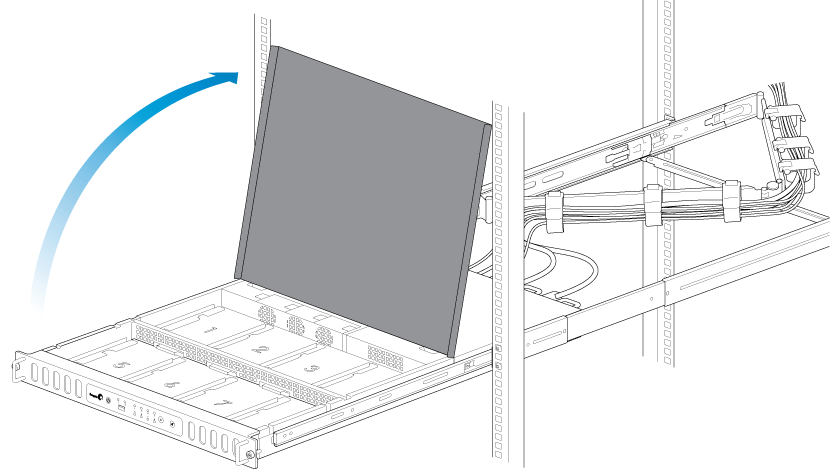
Insert the drives
Important info: Make certain that you are properly grounded before touching the disks.
1. Push the disk’s lock button to open the latch.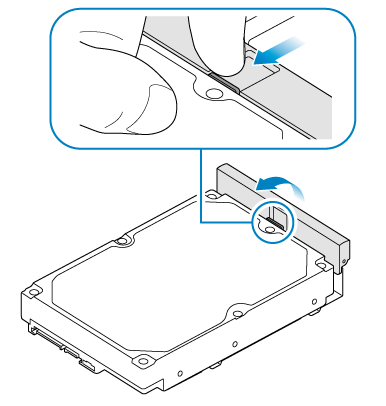
2. Place the disk on the NAS’s hard drive guides. Confirm that the disk is correctly aligned on the guides by gently pushing it away from the SATA connection.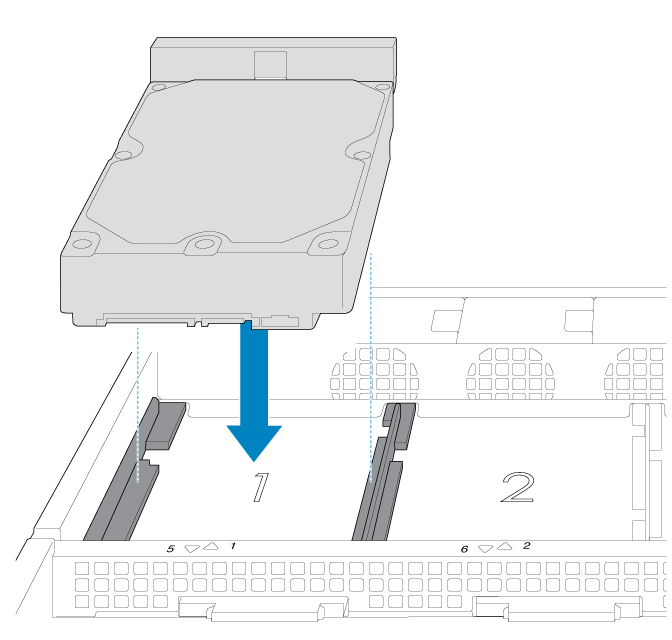
3. Slide the disk into the SATA connection.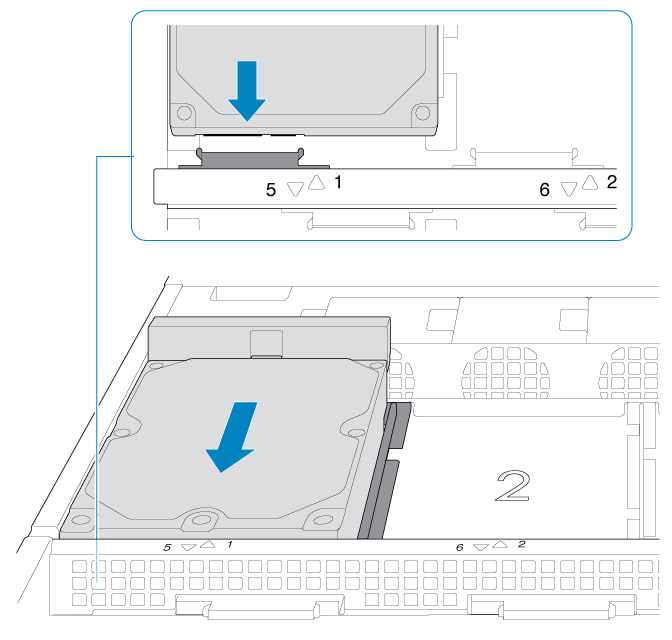
4. Close the disk’s latch.
5. Repeat the steps for each disk.
6. Close the cover and slide the NAS into the rack. To unlock the rails, pull the rail fasteners on each side toward you. Secure the NAS to the rack using the two front screws.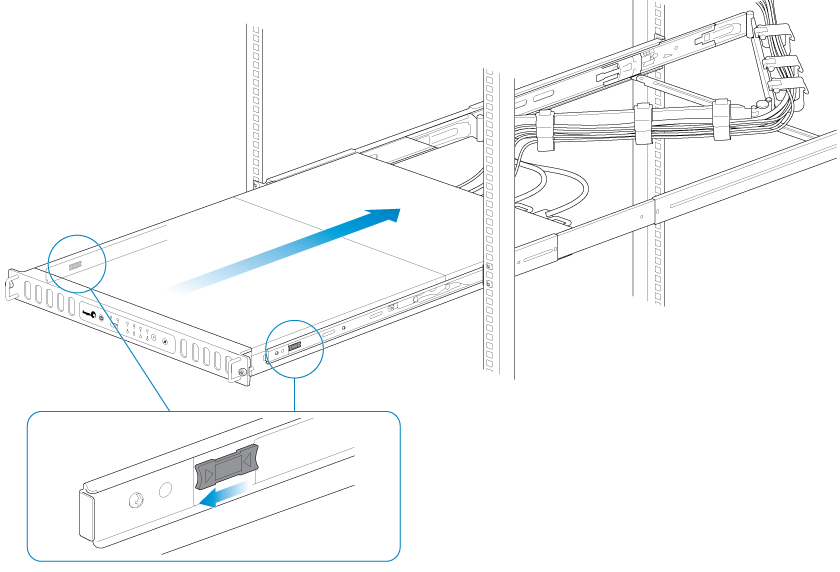
Step 5 - Log on to the NAS
1. Power on the NAS. Wait for the status LED to turn solid before moving to the next step.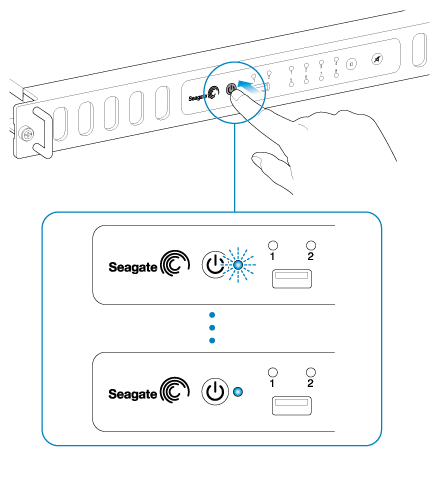
2. From a workstation on your network, launch a web browser to enter http://seagate-r8 or, http://seagate-r8.local for Mac or any workstation using Bonjour.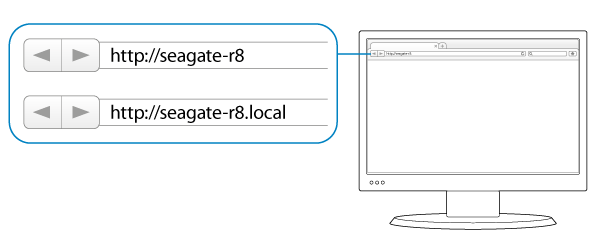
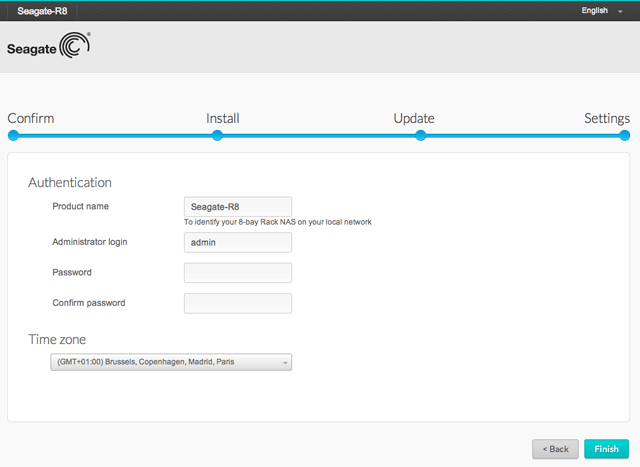
3. Follow the on-screen instructions to complete the installation.
Should you want to view the Manual in its full version please click here