You can create different shares that you can later make available to different users or groups.
A share is a folder on the NAS. A shared folder contains files that can be accessed by other people and can be shared on either a public (open to everyone with some restrictions) basis or private basis.
You can create, modify or delete shared folders at any time. When you delete a shared folder, you lose all the files stored in that shared folder.
Please follow this procedure to create a share:
- Log into Seagate NAS Manager as the administrator using Seagate NAS Discovery or by entering the IP address of the NAS device in the address bar of a web browser.
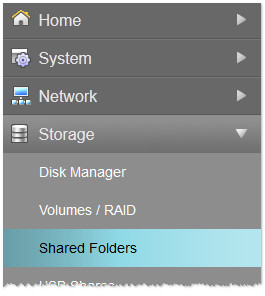
- From the left sidebar, select Storage, then Shared Folders.
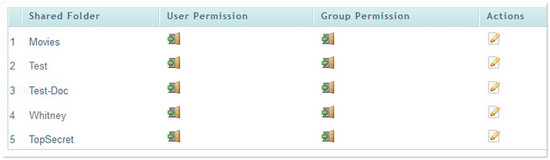
Your available shares (if any) will be displayed.
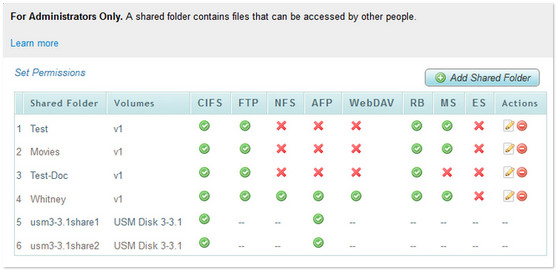
- Select the Add Shared Folder button.
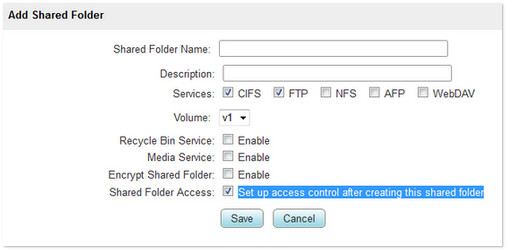
The Add Shared Folder page displays. - Fill in the information in the fields and select the desired services to be active on the share.
If you want the share to be a public share, make sure you uncheck the Set up access control after creating this shared folder box.
If you want the share to be a private share, you will be prompted to choose permissions after clicking on the Save button.
If the share you created is a public share, the share is already created and should now be available in the list of Shared Folders.
If the share is a private share, the Shared Folder permission screen displays. Click on the Edit button under the Actions column ( ) on the right of the Share to which you want to assign permissions.
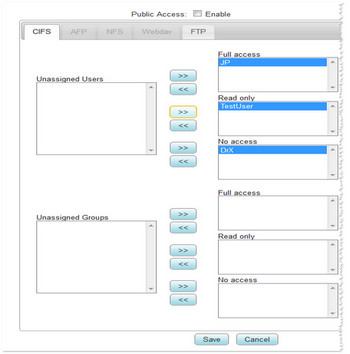
The permissions window displays. - Uncheck the Public Access box.
- Choose the users or groups from the list to the left and assign them to Full access, Read only access, or No access.