


Please follow this procedure to map a Seagate Business NAS share in Windows using Windows Explorer/File Explorer:
- Find the IP address of your Seagate Business NAS device. If you know the host name of your NAS, you can use that instead. The default host name will be on the label and will start with BA-XXXXXX.
- Press the Windows key
 + R to open the Run window.
 - In the Run window, type \\ and press Enter.
Example: \\192.168.x.xx or \\ba-xxxxxx
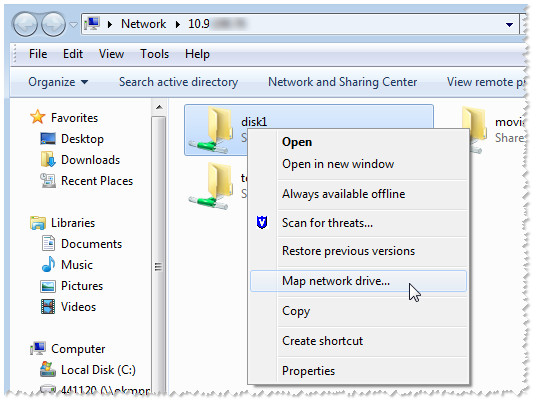
The Network window opens. - Right-click on the desired share and select Map network drive...
- Assign the drive letter to the selected share.
If desired, you may check the Reconnect at logon box to automatically reconnect to the mapped share whenever the computer restarts.
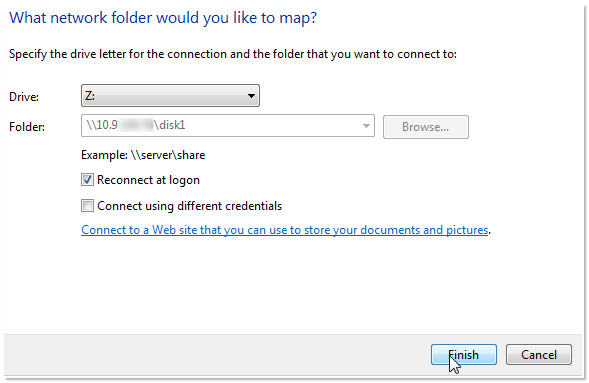
- Once you click Finish you will be prompted for your User name and password. Type in the credentials for the User or Shares you are tying to access and click OK.
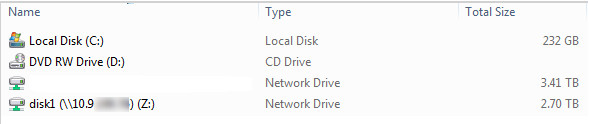
- To access the mapped shares, open (My) Computer and double-click on the drive letter you assigned to the share you want to access.
While connecting with either the host name or the IP address is fine and essentially does the same thing, Seagate recommends connecting with the host name if you have your Business NAS set for DHCP. Because of current DHCP standards, the IP address of your Seagate Business NAS may change, making all mapped shares unavailable if they were connected using the IP address. Mapping using the host name prevents having to re-do all the mapping of your shares.