


Note: When this article refers to a Wireless Device it is referring to a Seagate Wireless, Seagate Wireless Plus or a Seagate Satellite.
If you have used your Wireless Device with Time Machine then you can follow the instructions below to get it back to factory settings.
The Seagate Wireless Device can be formatted as Mac OS Extended (HFS+).
New: Apple File System (APFS)
Formatting the Seagate Wireless Device to HFS+ in Mac OS
- Copy any files that you want to keep to another location. Reformatting the drive erases all data.
Be sure to eject and disconnect any other USB drives before proceeding. - Click Go on the Apple menu bar. (If go is not on the menu bar, click on your desktop background once to make it appear)

- Choose Utilities.

- Double-click Disk Utility; this will open a new window.
- Select the Wireless Device.
- Choose the Partition button.

- Click the minus (-) button to erase the partition.
 This will erase ALL data on the selected drive.
- Enter a recognizable volume Name, for example, Seagate Wireless Device.
This is the name that will appear on the Desktop when the drive is connected to your Mac. - Click the Options button.
- Choose Master Boot Record (GUID and Apple Partition types will not work).
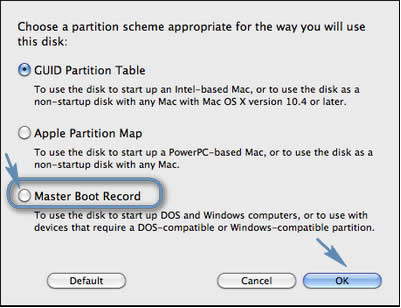
- Click OK.
Formatting the drive will erase all data on the drive. Be sure to copy anything you want to keep before proceeding. - Click Apply on the Partition screen to start formatting the drive.

The drive should be ready to use after a few minutes. Be sure to check that the Partition Map Scheme is Master Boot Record. If it reports as GUID or Apple Partition, restart the processing from step 7.